Quick Integration - Payment Link
If your goal is to integrate our payment methods into your e-commerce website without the complexity of developing and integrating a custom user interface, this is the recommended approach.
- Please review our API Reference section to familiarize yourself with the core concepts. This will help streamline your integration process and give you a better understanding of how our platform works.
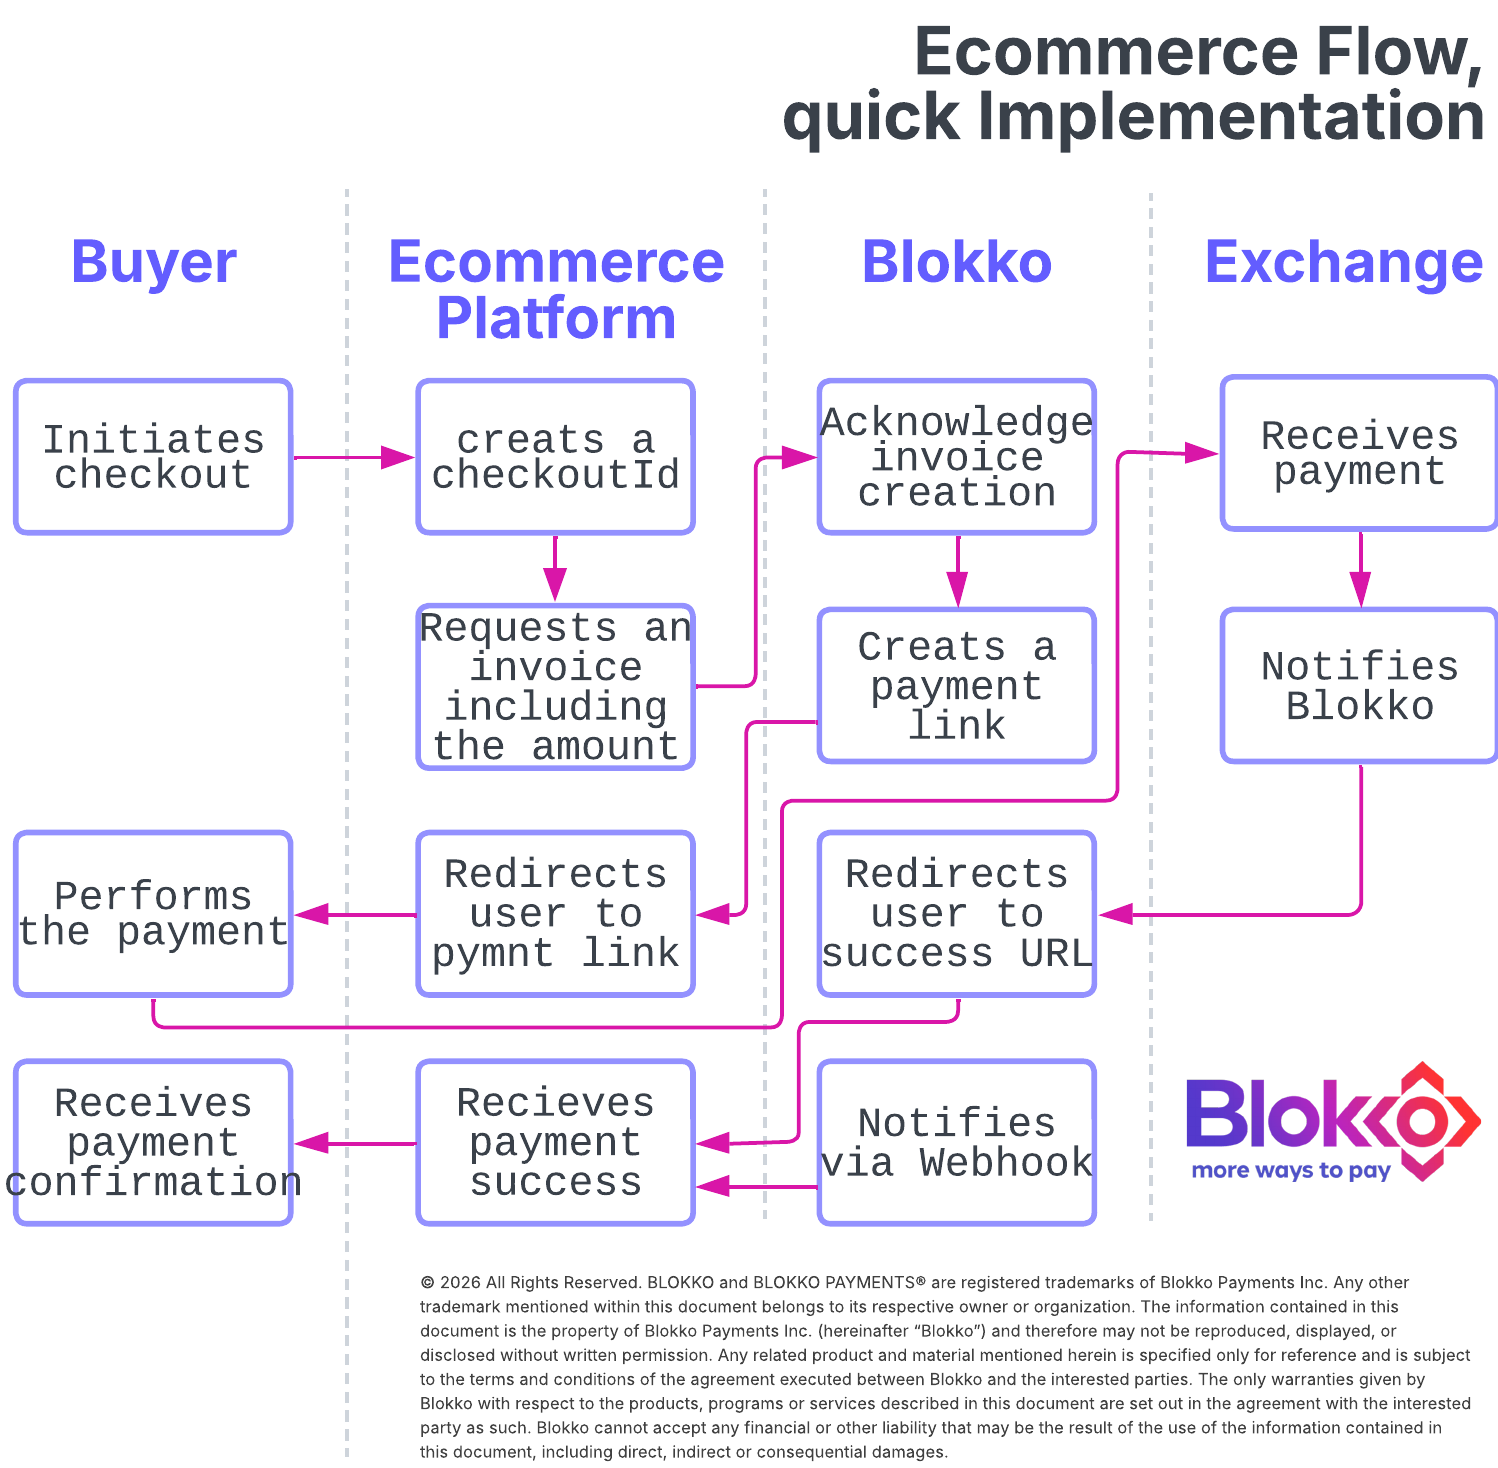
- Add a payment button to your checkout page, just as you would for any other payment method, such as credit or debit cards. An example of the payment button is provided at the bottom of this page.
- Once the customer clicks the payment button, you should close the order in your system.
- Next, call the
/v2/invoiceendpoint, providing the amount you want the customer to pay and the redirection URL to which the customer should be sent once the payment is completed. Please refer to the Redirection Guidelines section below. - The
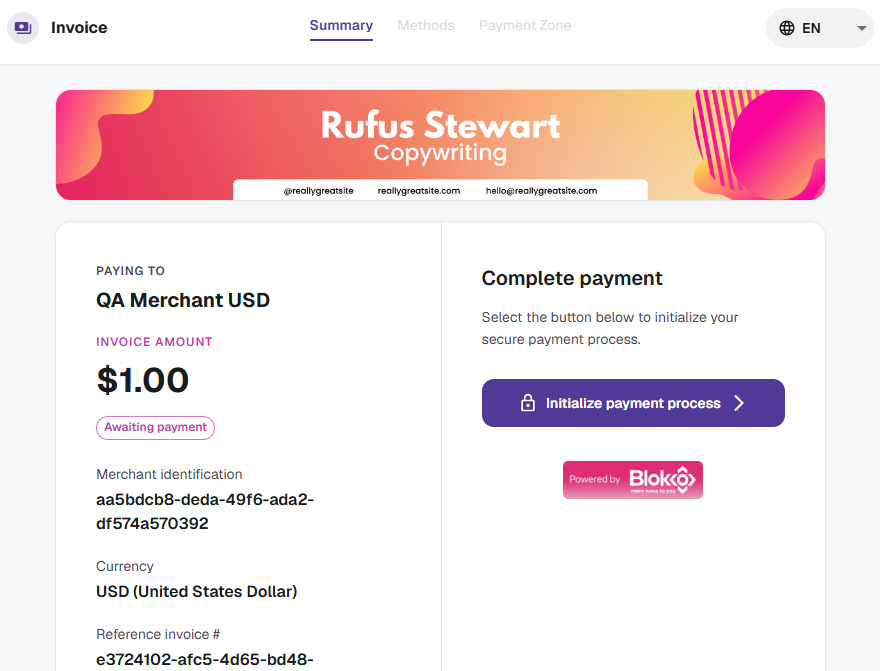
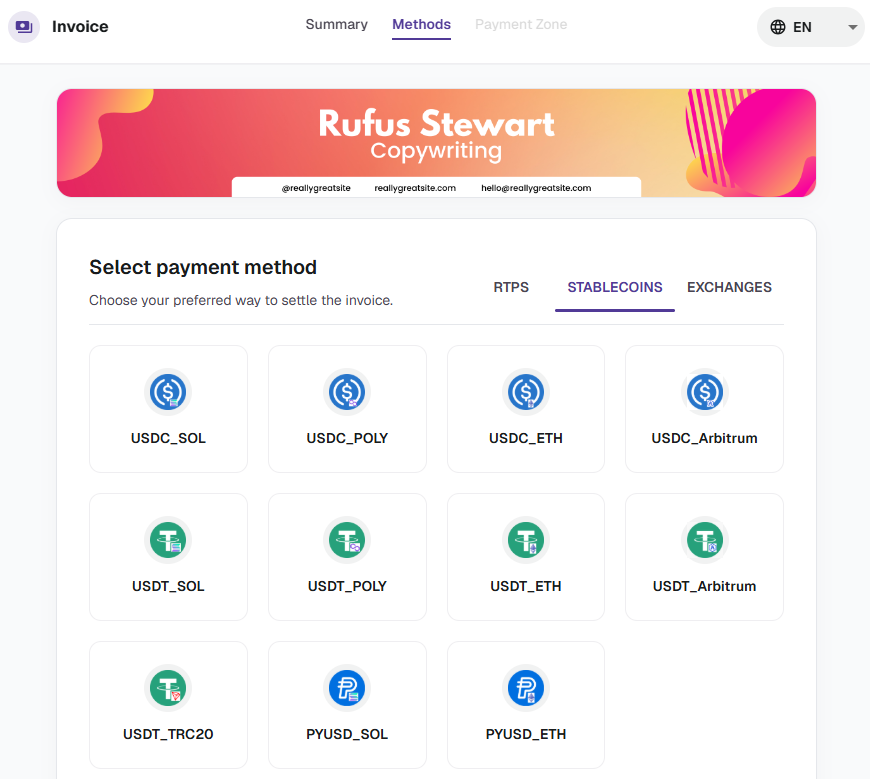
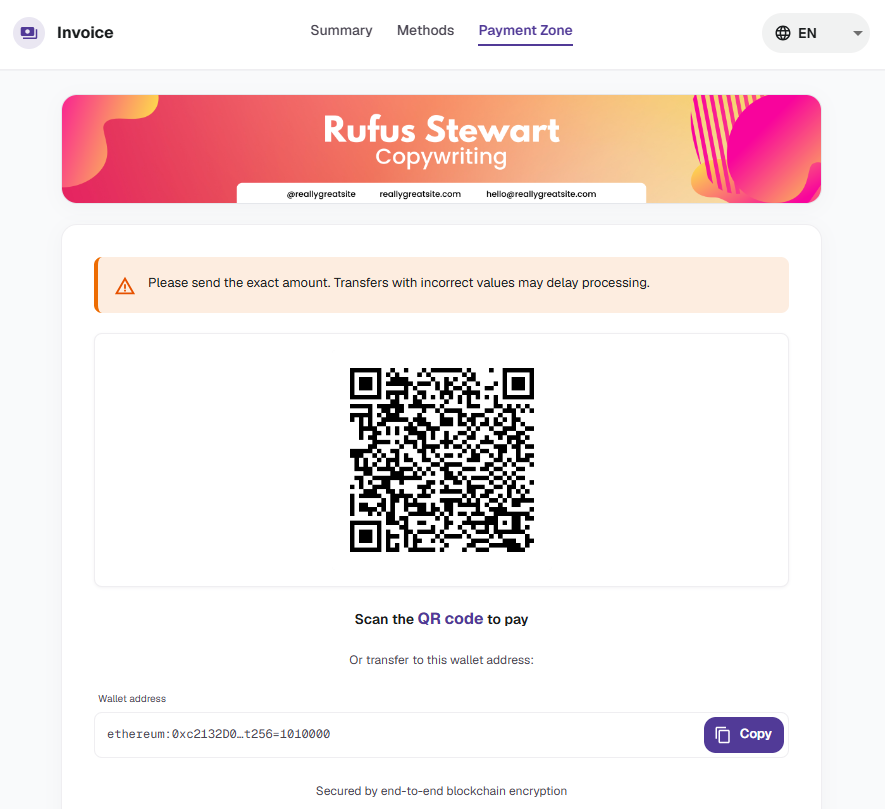
/v2/invoiceendpoint will return, among other parameters, aninvoiceUrl. You may open this URL in a new browser window; however, we strongly recommend displaying it within a floating container or modal to provide a more seamless payment experience. TheinvoiceUrlprovides a complete payment experience where the user can view the amount to be paid, select from different payment methods such as stablecoins, RTP, or cryptocurrency, and obtain a QR code to initiate the payment. Below are some examples of the payment link interface. - Once the payment is completed, we will redirect the customer to the URL you specified when creating the invoice. Please refer to the Redirection Guidelines section below.
- Register the payment in your system and continue with your standard order flow.
Redirect Guidelines
Upon a successful payment, we will redirect your user to the page specified in the invoice payload. This is a great opportunity for you to acknowledge the successful payment instead of waiting for the webhook event to arrive. We also provide webhook events, which you can configure through the following endpoint:
/v2/merchants/{merchantId}/webhook
Now, let’s say you want to take advantage of this redirection to mark the user’s shopping cart as paid. You can include a parameter in the redirection URL so that you can capture it when the redirection occurs.
Please note that if this process is not carefully implemented on your end, it could create a potential attack surface.
For this reason, do not use a parameter value that is exposed at any point during the checkout process. For example, let’s say your checkout process uses a UUID that is passed as a hidden value throughout the shopping experience. Attackers could easily discover that this UUID is being used to process the redirection and mark the order as paid. Therefore, you should not use this UUID as the redirection parameter.
In fact, we strongly discourage using a plain UUID in the redirection URL. Instead, provide a parameter whose authenticity can be validated and that could only have been generated by you. For example, you could use a UUID protected with AES-256 encryption and an initialization vector like CBC, GCM, CTR.
When receiving the redirection, you should first validate and decrypt the value using the same key used to generate it. Only after successfully validating it can you be confident that the value was created by your system.
Please note that Blokko is not responsible for an insecure redirection implementation that could lead to an attack on your payment process.
❌ Example of bad redirection URL implementation:
https://www.myshoppingcart.xyz/success/shoppingCartUuid=15f83993-ea33-4c2c-ab26-3c4de18822d9
✅ Example of a correct redirection URL implementation:
Please consider implementing webhook support. Webhook events are signed using an HMAC-SHA256 signature, allowing you to validate the authenticity of each message. Refer to our HMAC-SHA256 documentation to learn how to implement this validation, and use the HMAC-256 Playground to test your signature generation before going live. Please note that we are not responsible for webhook notifications whose authenticity you fail or choose not to validate.
Payment Link Interface
Here is a visual reference for the payment link interface. Please note that the header image on the payment link page can be customized. During the onboarding process, please provide an image with dimensions of 1200 × 200 px.

Right click and save this image to use it as a payment button.
Updated about 1 month ago